

We've gone to the Maryland Renaissance Festival every year since Chief was born, and for the past two, we've gone in costume. Last year we were Treebeard and two Hobbits; this year we were Cinderella and two mice!
Cinderella was one of the more complicated costumes I've ever made for Chief, but even still it wasn't super difficult. Here's how I did it:

SUPPLIES:
-a pink tank dress in your princess's size (I bought this one on Amazon)
-matching pink cotton fabric (1/2 a yard was plenty for my almost-3-year-old)
-pale pink grosgrain ribbon (nice and wide)
-3/4" elastic
-white scalloped trim (note: I didn't buy enough the first time around, so I used two different kinds for the collar and the ruffle on the skirt. The kind I bought for the collar ended up being much too big, so I needed to fold it in half. Don't be dumb like me; buy a ton of not-so-tall trim)
-accessories: a turquoise beaded necklace and a white headband
For reference, here's the dress we're making (you know, the one that the mice made for her):
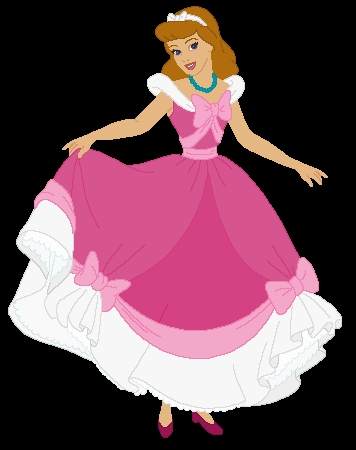 |
| via FanPop |

1. First, prepare to make the "over skirt" portion by cutting a rectangle out of your pink fabric using the math denoted in the diagram above: the height of the rectangle should be the length you want the skirt to be + 1 1/2", and the width should be the size you want the waist to be x 1.25, + 1/2". Fold in each of the short sides by 1/4" and hem with a zig-zag stitch (or serge if you're fancy). Then fold the rectangle in half, right sides together, lining up the short sides. Stitch together the top one-and-a-half inches only using a 1/4" seam allowance; you've now basically got a tube of fabric, only one side is almost entirely open (except for that inch and a half). Fold down the top 1/4" inch and press, then fold it down another inch to make a waistband for the skirt. Sew all the way around, using a 1/4" seam allowance, and leaving a good inch or two gap so you can snake in your elastic.

2. Cut the elastic so that it is just 1" shy of the circumference of your princess's waist. Feed it through the pocket you've created in your skirt and then overlap the ends by 1" and stitch them together. Push the elastic into the waistband and sew close the gap you had left. If your princess were to put on her skirt now, it would have a nice triangular opening in the front.

3. Take your dress and slide it into the skirt, lining up the bottom hems. (If you want, you can use a quick whip stitch on the sides to attach the waist of the skirt to the dress, but I recommend you pull it back out again before your princess wears it. It's more comfortable for a little toddler body and easier to put on if the elastic waist is not actually attached to the dress underneath- it lets the elastic stretch more naturally.) Take your white trim and pin it all the way around the bottom of both skirts, upside down (right sides together). When you've sewn the layers all together, fold the trim back down and press; your stitches are hidden and the bottom of your skirt is nice and full!

4. Now, if you have purchased a reasonably-sized trim, this step won't be necessary. But if you got something mega huge like me (oops), then you'll need to cut the trim so it's the right length to go all the way around the neckline of the dress (to include the straps), fold it in half (right sides together) and stitch the two short sides, then flip it right-side-out. Now your collar is a decent width and also double in thickness, so at least it will hold its shape well! Stitch it all the way around the neckline of the dress so that the two ends meet in the middle of the front.

5. Okay, now for the ribbon. You'll need enough to wrap around the waist, and then have the tail ends come up from the sides, diagonally, to meet in the middle (right at the point where the ends of the collar come together. (I folded my ribbon in half first because the only options I could find at JoAnn were too wide or too skinny.) I stitched the ends together and attached them to the top of the dress, and then I stitched the ribbon to itself at the sides of the waist, but otherwise I didn't actually attach the ribbon to the waist of the dress- again to let that elastic stretch as much as necessary for easy on and off. (There are no fasteners on this thing, so it has to go on over the head and streeeetch at the middle in order to do so.)

6. The only thing left is to run some more pink ribbon around the bottom of the dress (which you should probably completely stitch down, but I didn't because I was finishing this the night before the Festival and ran out of time! I just attached it in a few places) and then make 3 bows- attach one at the top center of the bodice, and the other two at the points where the skirt opens. That's it!

She's entering her "I hate posing for photos" phase, but she really does love this costume. She's been asking to wear it almost every day since! The weekend after the Festival, we went to a Halloween party at a friend's house and she got to wear it again, which made her very happy. It's definitely not perfect, and was rather hastily thrown together at the last minute, but I think it's awful cute.
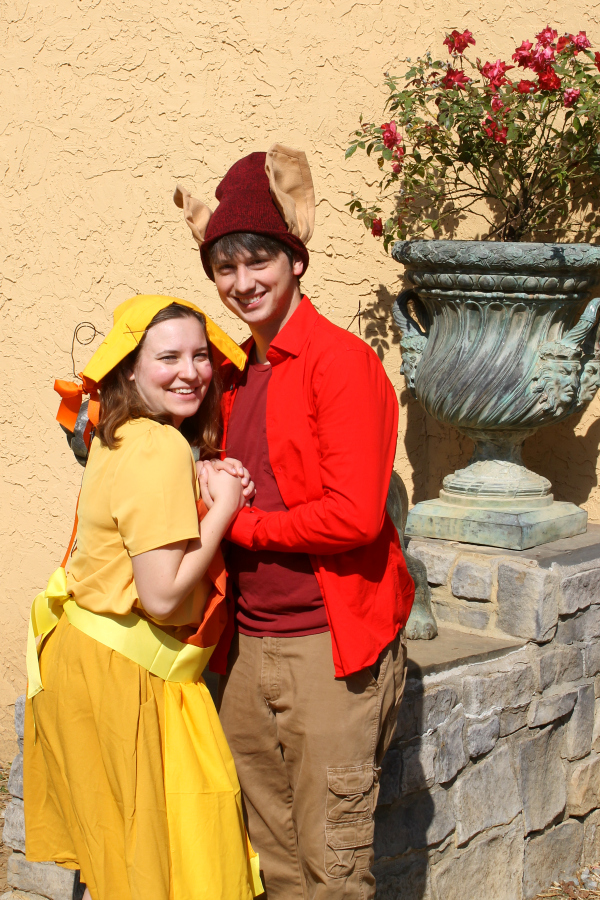
The costumes for Jacques and Nameless-Lady-Mouse were much easier. For Lady Mouse, I adapted this tutorial to make an apron. I used orange fabric for the top and yellow for the bottom, attached some yellow ribbon rather than a ruffle, and used ribbon for the ties. Then I made a simple rectangular hat/veil/thing out of yellow fabric and wore it pinned in my hair with bobby pins. I wore a yellow skirt and top, and made a tail out of floral wire with a little orange bow near the end.
As always, Mr Geek's costume was almost entirely no-sew- almost. He wore khaki pants, a red tshirt, and an un-buttoned red shirt. I bought a red beanie and attached two ears I made from felt, then made him a tail out of floral wire, too (but no bow for him).

What are you going to be for Halloween?
Much love,
The Geeks
No comments:
Post a Comment